How to footprint or perform reconnaissance?
In this lab we will be using both a kali Linux and windows 10 operating system. We will be performing a reconnaissance to find some information on an external web server, to find potential vulnerabilities/ open ports on that server. We will need a web browser (google preferred) and zenmap installed on the Linux system connected to the network.
There are a lot of open-source tools available to perform reconnaissance, and for this explanation I want you to think of tools as not only softwares or plugins, or addons, but just simply as a means. Because we only know the name of the web server as www.partnercorp.xyz and we do not have any other information on this server, we need to try to figure out the DNS (domain name server) for that particular website. To do this we will take advantage of the public database, “whois”, that stores and identifies who owns domains and how to get in touch with them. This site commonly stores detailed information for domain extensions like .com, and .net, but at least generic, yet not so detailed information on all other extensions.
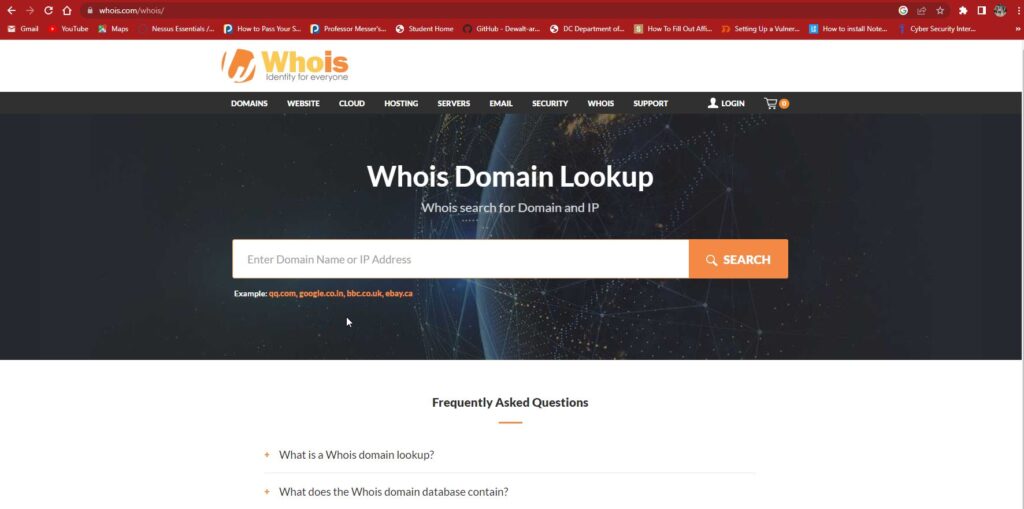
The first means we will use is a website www.whois.com, which we can navigate to from our windows 10 machine, then to google chrome, then in the URL box/ google box, type whois.com.

Here you can enter the domain name of a server or website, even an Ip address, and the whois website will return whatever information it has on the domain entered. In this specific case we want information on www.partnercorp.xyz. Type PartnerCorp.xyz in the search bar and click search or press enter.

So as you can see we were not able to find a lot of information on the web server, but a very important information was displayed, the Name servers. The name servers are the DNS servers that we would need to try to find the IP address for the web server and anything else related to the web server.
Now we can navigate on the windows 10 machine to the start button, right click, and then click PowerShell, then open the PowerShell application. Now that we have PowerShell up and open the first thing we will notice is that PowerShell is a Command Line Interface, application, which simply means that only the functions/commands inserted in, will dictate a response, in other words you will have to tell the application what to do by typing it.
One of the first commands that we need to familiarize ourselves with is the nslookup command. This command allows you to query internet domain servers for information about various hosts and domains, making this tool essential for what we need. In the PowerShell window Type nslookup www.partnercorp.xyz ‘name_server’, which in this case can be either NS1…… or NS2…… from the whois results.

As you see nslookup was able locate the IP addresses associated with both the web server and the DNS server: NS1….. 163.128…… while partnercorp.xyz is 73.44.215.1.
Just as an additional step to give some more insight into Command Line Interface, we can try to use another command tracert. This command will map the routes/ hops it takes to the destination Domain from the system you are currently using. Type tracert PartnerCorp.xyz in the PowerShell window.

This results in only three hops being made, which means the relative distance/location to your logical location is close, and or there were only three routers/networks that your connection had to go through in order to get to PartnerCorp.xyz.
So, the final step in our reconnaissance is closer to completion, as so far we have gathered both the DNS name servers and the IP addresses for the servers involved. Now the only missing piece of the puzzle is to find out if there are any open ports available on the web server PartnerCorp.xyz, that we can either 1.identify and or 2. Sooner/later exploit.
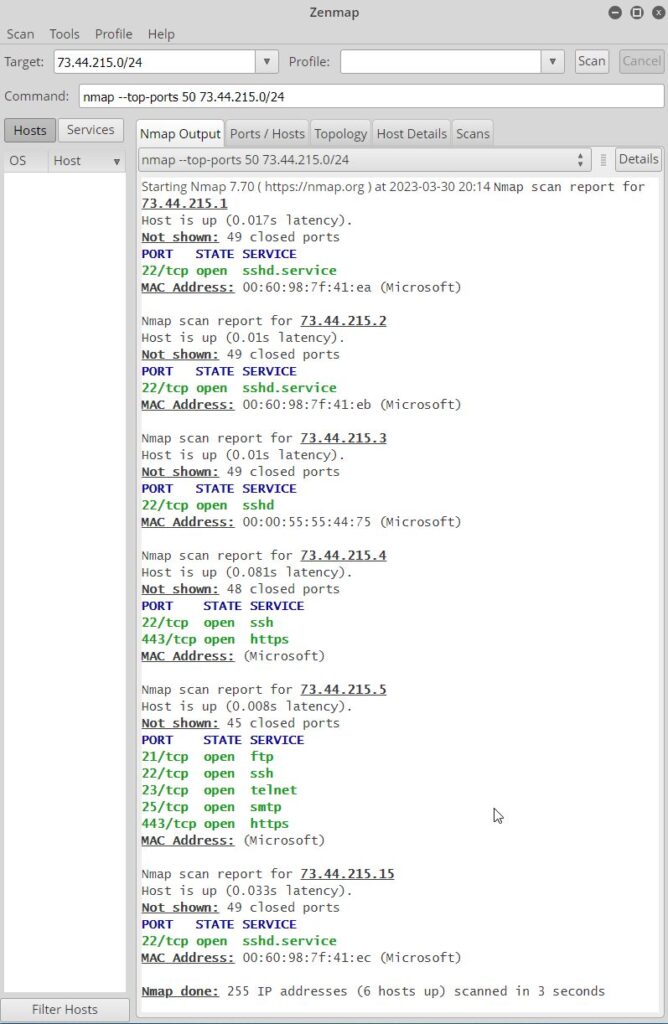
In this scenario we only want to do reconnaissance. One tool we can use to scan for ports that can not only tell if the port is open, but also the port number associated with said port, is Zen map/Nmap. Other tools exist like Nessus by tenable, or Qualys amongst others. This tool can be run in several different ways including from a CLI in Linux distributions as well individually as an application on either windows or Linux Operating systems. In this case, it was run as an application on a Linux operating system. The requirement was to locate the 50 top ports opened. In order to do this, we need to type nmap –top ports 50 73.44.215.0/24, where the –top ports 50, specify the number of top ports to check, and 0/24 specifies that we want to scan the entire network, including the default gateway. Here we have the results of the scanned devices in the network and the ports that are open.

Now that we have completed some reconnaissance, we can move on the other stages of the cyberkill chain.
PLEASE NOTE THAT THE SERVER WITH IP ADDRESS 73.44.215.5 HAS SEVERAL PORTS OPEN THAT ARE CONSIDERED VULNERABLE, INCLUDING FTP(TCP 21), TELNET(TCP 23) AND SMPT(TCP 25), AND SHOULD BE TURNED OFF TO REDUCE THE RISK ASSOCIATED WITH A THREAT ACTOR USING THESE VULNERABLE/OPEN PORTS TO GAIN ACCESS TO THE SERVER.
