Firewall? That ‘Fiery’ wall that stands between you, and everyone outside of your network.

Before we can even think of configuring a firewall, let’s try to get a better understanding as to what it actually is, it is definitely not a wall that’s on fire, even though it definitely looks exactly like it. A firewall is one of the main security devices that should be on every single network, no matter what it is used for (at least a basic one, or one with basic configuration). Its main purpose is to act as a network barrier.
I like to think of it as a TSA agent, when trying to travel. When You arrive at this barrier, it observes, who you are, where you are trying to go, and most importantly, if you are allowed to go there.

There are different firewall types, firewall architectures, firewall technologies, and important firewall limitations. Firewalls can be software, for managing just a few devices, and hardware firewall, for managing larger infrastructures (normally built into a broadband router). Firewall Architectures simply describe the logical and/or physical layout, and positioning of the firewall in the network. Firewall technologies describe the types of technology used to accomplish different results/uses of the firewall, such as packet filtering firewall, application-level firewall, proxy firewall, VPN, NAT etc.
Just like every device, they all have some margin of limitations. Simply put, firewalls can block specific ports, but can’t inspect the packets payload, can filter Ip addresses but cannot prevent spoofing. These short comings are there, but if you are aware of them and you properly configure your firewall both for security and compliance, while corelating your firewall with other security devices to improve your security measures, such as IDS,NIDS,NIPS etc.

Configuring Pfsense firewall
Start to finish
Now that, we have talked about firewalls for a little bit, Let’s dive into configuring one, specifically, PfSense. Using your admin credentials, login to the console through your browser.
For this demonstration, you want to configure a specific technology within pfSense to setup a Demilitarized zone, which is an area specifically allocated between the internet, and the internal network of an organization, mainly for hosting devices such as web servers, database servers, any type of servers you use that may be required to be accessed by both/either the internal network or the internet.
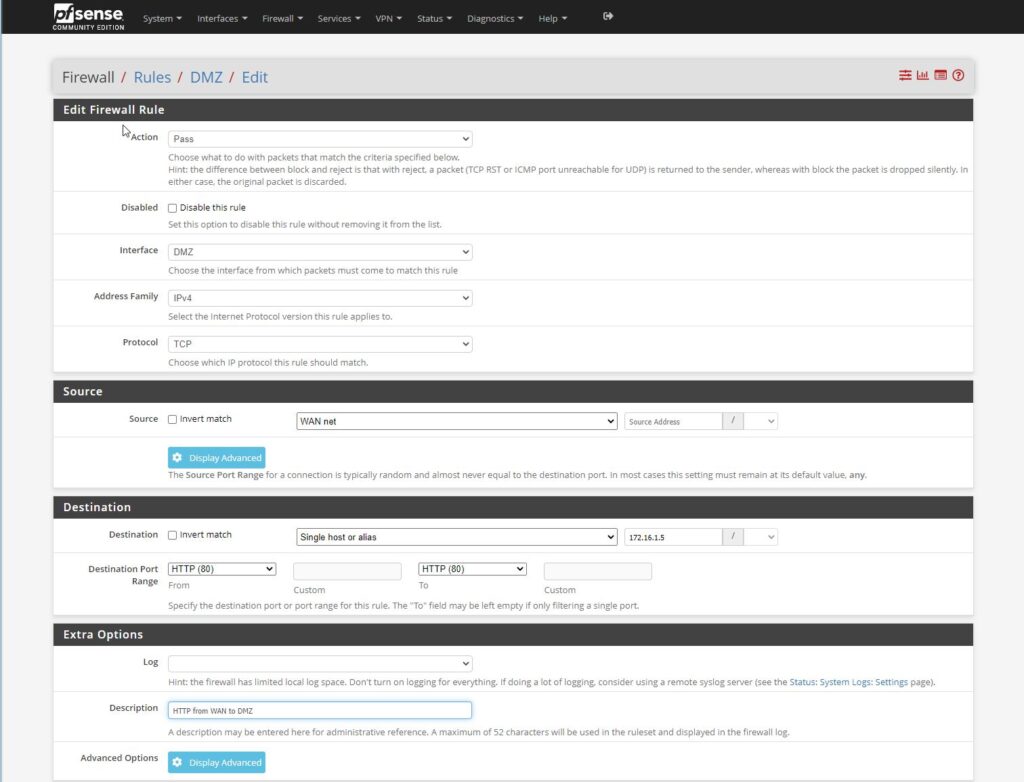
We start by navigating to the top section of the page where we can see the drop-down menus, click on firewall, then rules, then DMZ. Here we have the option to block, reject, or pass a rule (packet). Rejecting returns the packet to the sender, and blocking silently drops the packet as if it was never sent. For this demo, we want to pass.
We want to ignore the disable this rule button, and move down to the interface. The interface that we want to configure is the DMZ, and leave the other two , address family and protocol as is. Next we are going to configure the source to be the internet, WAN net. We use this as the source because we want to configure HTTP(S) traffic from the WAN to the web server in the DMZ.

Here we want to configure the destination to point to a single specific host or Ip address of the webserver within the dmz that we want to configure. From the drop-down menu select single host, at the corresponding IP address to the Ip address box , then configure the destination port range to be from and to HTTP. This specifies which port number will be used for the rule we are currently setting.

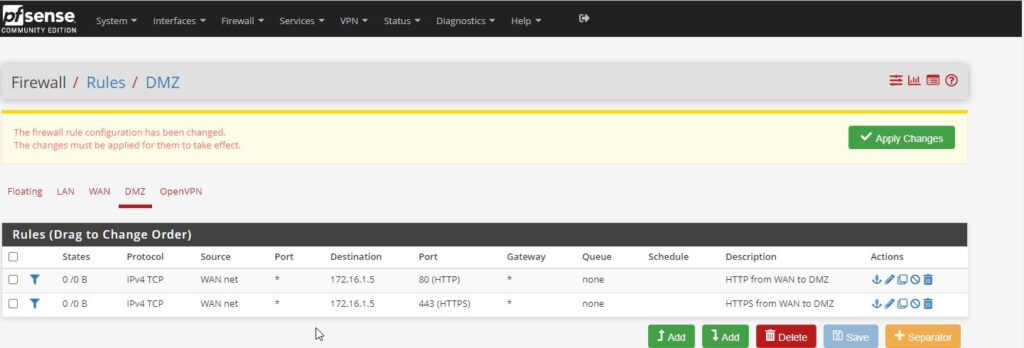
Last but not least we will give this rule a brief description so we can identify and remember what the rule does., then click save.

You want to ensure that after each new rule or configuration that you apply the changes so that they can take effect, and/or be activated.
Now that we have created our first rule, instead of going through the entire process, and since we just need to create a rule for HTTPS as well, we can copy the rule that we just created, which brings us to a duplicate window with the same settings that we can now edit.

Click here to copy!
Since the only difference between this rule and the last is the fact that we just set up HTTP on port 80, and now we want to use HTTPS on port 443, which are the only changes that we will be making to this rule, and the description to reflect the new rule for https.
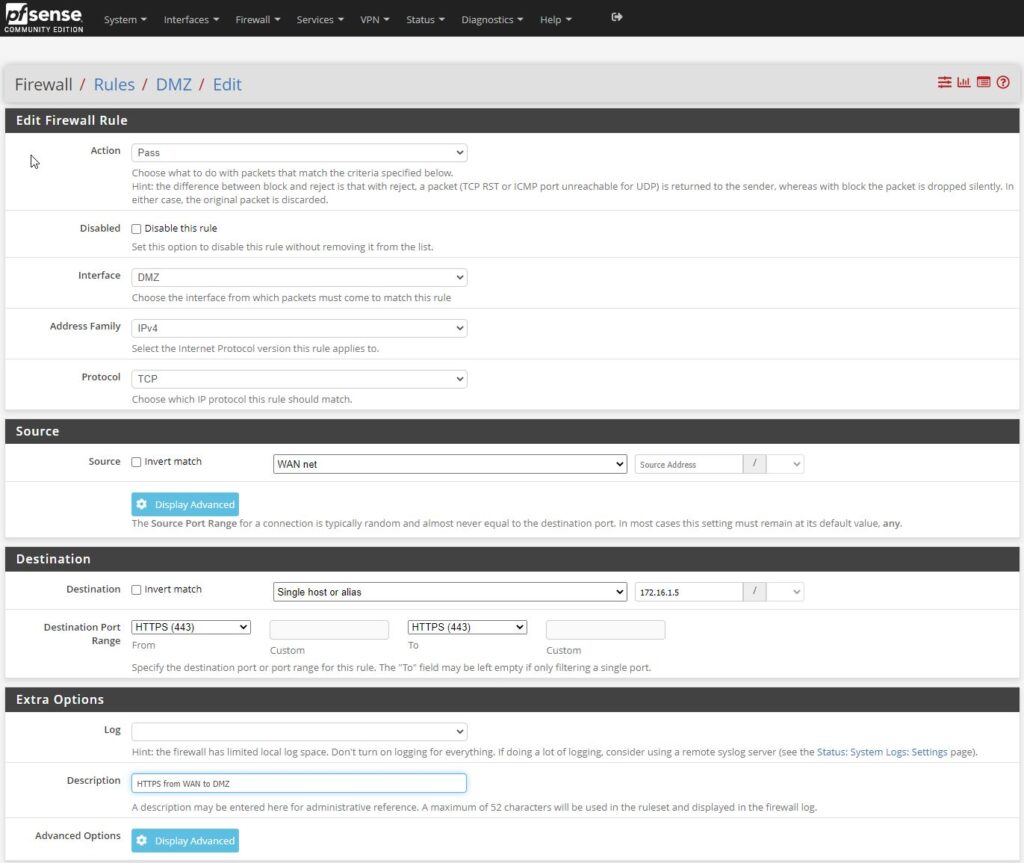
Again, save and apply changes.
Now we have to configure the firewall to allow LAN traffic to the WAN (internet). For this one you will have to start a new rule, for the action, -pass, interface – DMZ, address family default, but protocol change the setting from TCP to any, to allow any traffic/packet to pass through the firewall from LAN to DMZ.
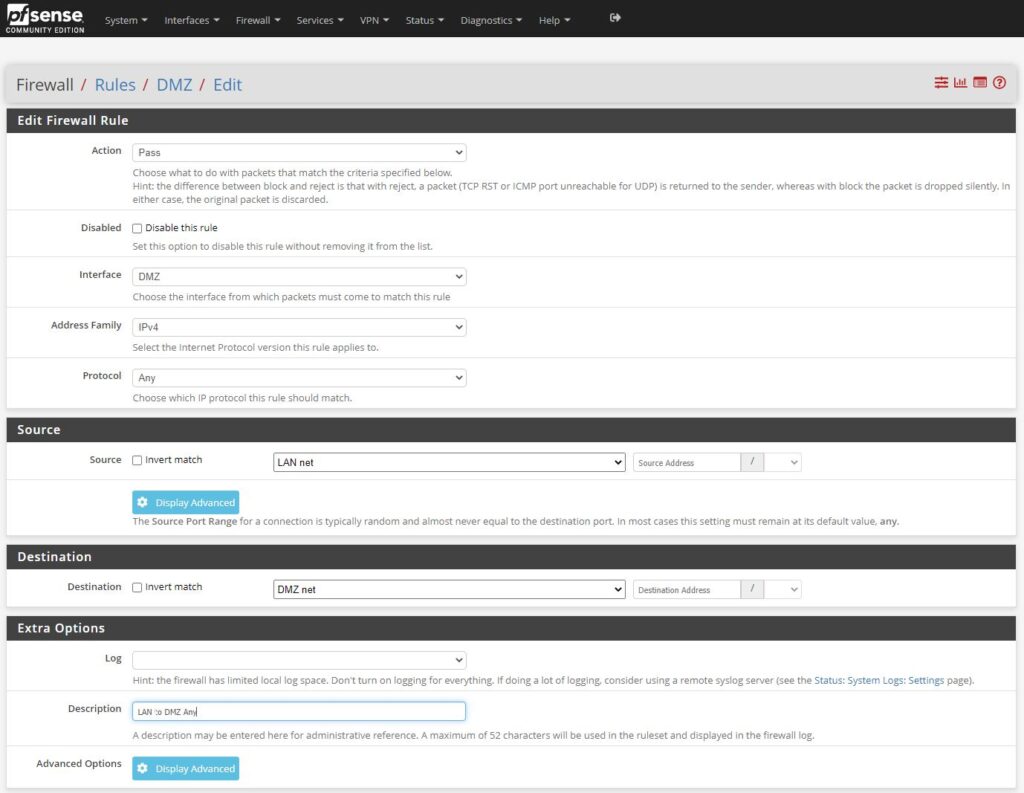
The only other thing to do to complete this rule is to add the description. And then apply the changes.
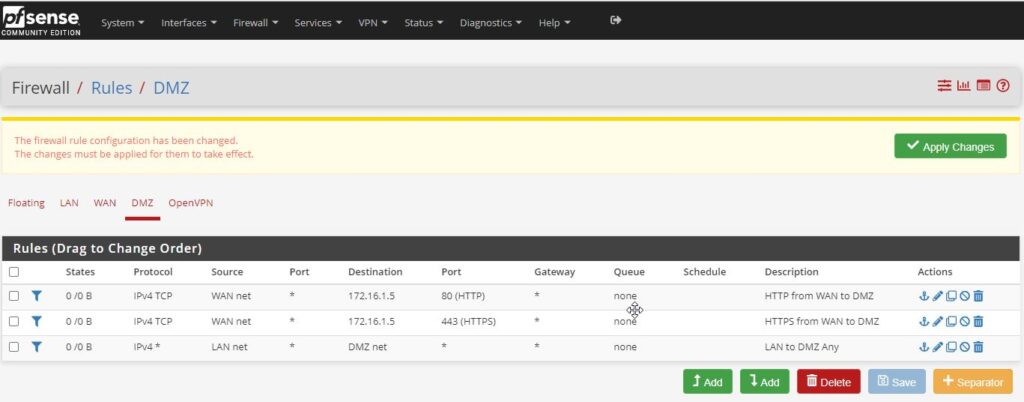
I specifically enjoyed this demo, I do apologize about the picture quality, it is due to the fact that the background is white, and the text is barely black.
